
About the Apiary
An informative and sometimes humorous column published in
The New Zealand Beekeeper Journal
GET READY FOR THE NEW SEASON
About the Apiary - September - 2018It’s been a relatively mild winter in Wellington as I write this in early August. On 4 August, I saw my first overwintered queen bumble bee out flying just in time to visit the plum blossoms.
I looked around my neighbourhood to see what’s flowering and although there are not many flowers, I was surprised at just how many different species have begun to flower. Even some ‘summer-flowering’ species have a few flowers.
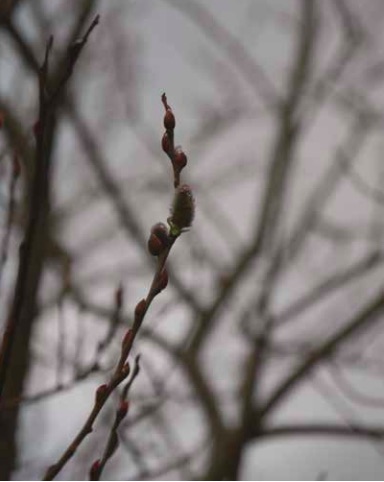
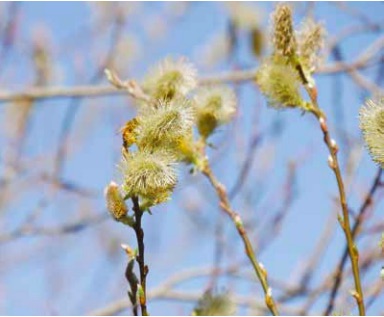
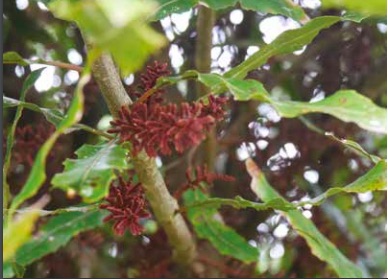
Of course, the normal winter/spring sources are available to the bees, such as wattles and tree lucerne. Camellias have had a long flowering, spring bulbs are everywhere (which bees will visit if nothing better is around), the odd dandelion is flowering, pussy willow is about to flower and now fruit trees are making an appearance. In the bush, rewarewa is budding, which we only see every fourth year in our region.

Most hives are advanced for this time of the year—some already have five to six frames of brood. The odd hive is further ahead, already occupying nearly two full-depth boxes with bees. I left one hive three high and the bees have hardly touched the top super of honey. Others have eaten everything and have needed feeding with sugar syrup. The growth of a hive is dependent on how many hives you have in an apiary, how many hives are close by, and the abundance of pollen and nectar sources you have within a few hundred metres of the apiary
I also have a nuc in a shaded part of the garden that has brood in two frames, making the equivalent of a full-depth frame of brood. The bees are small and there’s no pollen surrounding the brood, so it’s living day to day. It got part of a pollen patty thanks to NZ Beeswax Ltd (a gift from conference), and a day later they were flying well.
At the other end of my section is another nuc which gets sun for half a day. This has three full-depth frames of brood with pollen in frames beside and surrounding the brood in the frames. What a difference 30 metres and sunlight makes.
Inspecting the hive
With the weather reaching 16°C and bees flying well, it’s possible to do a quick inspection of the hive. Open the hive and place the roof upside down on the ground beside you, or put it on a stand so that you are not bending your back. Then lift off the top super and place it on the upturned roof.
Use the hive tool to break the seal between the bottom super and the floor and tip the super back on the bottom board so it’s held at a 45-degree angle. If the bottom boards is dirty and full of debris, scrap this out at the entrance. Then look up into the bottom super and glance up into the frames. This gives you an idea of the bee population in the bottom super
Also, look at the condition of the frames again from underneath and see if there are any mouldy frames. Even though the bees will eventually clean these up, I recommend you replace them with drawn or new foundation frames.
Place the super back on the bottom board, then waft a little smoke across the top of the frames in the bottom super. This encourages the bees to go down into the frames so none are squashed when putting the second super back on again.
Most of the bees and brood will be in this top super. Remove an outside frame and quietly break the propolis seal between each frame, then move the frames across one by one to expose a couple of frames with brood. Gently guide one out without touching the other frames or squashing any bees. If you do squash any bees, one is likely to be the queen!
Look to where the brood is emerging on the frames and by using the tip of the hive tool, flick off the cappings from 20 cells and look at the brood underneath. An alternative to flicking off cappings is to draw a line across the brood, thus opening the cappings on the cells slightly. This shouldn’t damage the larvae underneath if you only just penetrate the cappings.
What you are looking for is healthy brood. If they all look healthy, great. Now look for eggs surrounding the brood, which shows that the hive has a queen. Are the very young larvae floating in royal jelly, indicating good nutrition?
Is there a band of pollen around the cells at the top of the frame? If none, put on a pollen supplement patty. Calculate the number of frames of capped brood—for each frame, you will need three empty drawn frames so the bees have something to rest on. (A strong hive will need another super.)
Check whether drone brood is developing. Only healthy hives with lots of protein coming in will produce drones. If there’s a frame or more with drones, it’s likely your hive is going to swarm, perhaps in four weeks’ time when these drones are mature.
Now begin checking the amount of honey stores present. If the hive is getting down to the last three frames of honey or below this level, start feeding sugar syrup. It doesn’t matter how strong, as a one-to-one ratio of sugar to water is a bit stronger than what’s coming in from blossoms. Put in a feeder and fill it, then dribble a little over the bees to let them know it’s there before closing the hive.
If you don’t have any sort of feeder, fill a zip lock plastic bag threequarters full and lay it flat on the top bars of the super. Using a small brad, punch five or six holes in the top of the bag and press down slightly on the bag to create of pool of syrup. Allow a little to dribble over the side so the bees can find the syrup. The bees’ weight will gradually press down on the bag as they take the syrup. Then add an empty super and close the hive. This should only take five to 10 minutes, so shouldn’t chill the hive.
You have now done your first spring inspection, cleaned the bottom board, checked for the presence of a queen, did a quick brood check, protein check, calculated whether the hive needs another super and fed it if necessary.
The hive is good for another 10 days, when you will inspect it again and perhaps reverse the first and second supers if all the brood is in the top super. This will give the queen extra room to move up, which stops overcrowding and therefore is a form of swarm control.
Controlling swarming
If the queen was replaced in the autumn, the hive is unlikely to swarm despite high bee numbers, as the new queen usually emits enough pheromones to keep all the worker bees’ ovaries suppressed.
It’s natural for the bees to start some ‘play’ queen cells. I tend to rub off any along the edges of frames and leave those along the bottom of the frame. It’s then an easy matter to check if queen cell development has started by tilting the top super back and looking along the bottom bars for queen cells being lengthened or for an egg in a queen cell. You have to split the hive once queen cell development has been initiated.
Don’t rub out or slice off the first queen cell you come across, thinking it’s a swarm cell. It might be that you inadvertently killed the queen during your last inspection and this may be the only queen cell. Look at all the other brood frames to determine what’s going on in the hive.
Preparing supers
Most beekeepers are well on the way to getting everything ready for the spring work, which for some starts now. Hobbyists will be making up the odd super and frames for the honey flow.
My basic hive consists of five supers: three full-depth super for brood and honey stores and two three-quarter supers for extracted honey.
I use full-depth supers for a number of reasons:
- it’s the basic unit for a commercial beekeeper.
- some of my hives naturally have two queens, mother and daughter laying and if both are really productive, they can fill two supers with brood. (When this happens, the hive can get up to eight or nine supers high on a good, heavy nectar flow.)
- I do not use queen excluders, so have to reverse brood chambers to keep the queen moving up to keep her laying
- I like to winter my hives strong so they can be split in the spring to stop swarming
- my main flow is early and there’s only a dribble of a flow after December, so the bees can easily chew through a box of honey before winter.
My choice of frames in my brood supers is wood and wax frames. There are advantages and disadvantages to using these: they require a lot of work to assemble, are fragile with foundation and unless you use heavy wax foundation, will blow out in the extractor when processing mānuka honey. Some of the wood being imported is fine grained, so can split.
In damp hives, the end of the top bars rot out quickly. Dipping the ends in Metalex® (copper naphthenate) will fix this problem. Take normal precautions when handling this material: gloves, open environment, etc. Allow to dry thoroughly and air for several weeks until the smell of the mineral turps is completely gone. (American research has shown that the copper is very stable in wood.)
The beauty of wax frames is that they are natural. The bees will build them out quicker on a minor flow where they are reluctant to draw out plastic. It’s easy to hot dip wooden frames in a vat to clean the old brood frames and recover the wax.
Plastic frames can warp and reduce the ‘bee space’ between frames, so parts of plastic frames are not used for brood, whereas wax frames can be drawn out and filled with brood wall to wall.
Field bees returning to the hive dance on the frames in the bottom super to recruit more foragers. Vibration passes through wax frames easier than plastic frames, so could we be losing honey by using plastic frames in the brood nest? Maybe.
Plastic frames have the advantage of being ready to use once coated in beeswax. If brand new, allow them to air for a few weeks to get rid of that plastic smell or the bees may be reluctant to move up into them.
Manufacturers give you the choice of either 33-mm and 35-mm (measured centre to centre) wooden frames in the brood nest. I use 33- mm Hoffman frames in my brood supers, because these leave a 10-mm gap between the frames and the side of the super.
If you use 35-mm frames, the frames completely fill the super edge to edge. Often commercial beekeepers use only nine frames in the super, as it makes them easier and quicker to remove.
The major mistake I see with new beekeepers is that they space out the brood frames. The brood frames are designed to be pushed up tight against each other, because when they are drawn out they have the correct bee space between each frame; i.e., one bee width. If the brood frames are spaced further apart, the hive will require more bees to keep the brood nest warm, hence there will be fewer bees in the field.
As frames age, propolis builds up between the frames, increasing the bee space. It’s important to clean the sides of the frames in the spring to get the bee space between the frames back to normal. After cleaning, push the frames together hard, after having first checked that a bee or the queen is not between the frames you are pushing together.
In the honey super, it’s OK to space the frames after they have been fully drawn out. Eight or nine frames in a super will encourage the bees to draw out the comb further, making frames easier to uncap.
Hive tools
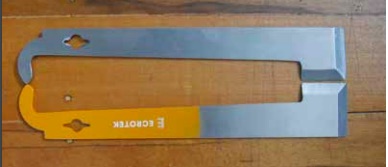
At conference some of the sponsors were handing out hive tools. According to Wikipedia,
A hive tool is a handheld multipurpose tool used in maintaining and inspecting beehives. Hive tools come in multiple variants and styles, and is intended as an all-in-one tool for beekeepers.
It’s interesting seeing the types of hive tools beekeepers use. Years ago, some beekeepers used to make hive tools from vehicle springs as these are hardened steel. They were big and heavy but they stood up to commercial beekeeping. Others started with a flat screwdriver and found this perfectly acceptable.
I was told by one supplier that he sells the Maxant type ‘J hook’ tool 30 times more frequently today than the paint scraper type hive tool.
My wife picked up two tools for me from two different sponsors at conference. Both were J hook type tools; one was left handed and the other right handed; i.e., I like to flick the capping off a cell using the point of the bevelled edge. Being ambidextrous, (naturally right handed but copied my older left handed brother in a lot of things like writing), I can use both and I thank the sponsors for their generosity. I have also looked up their websites using the tools as a reference, so their advertising worked.
The type of hive tool you use seems to depend on what you first learnt to use. I use the paint scraper tool, probably because these were far cheaper to purchase when I first started beekeeping. Today I prefer to get 10-inch Richard paint scraper tools from Canadian Tire. I order a bundle whenever somebody visits Canada.
A hive tool is meant to stay in the palm of your hand when working hives, but occasionally I absentmindedly put them down and don’t usually find them again until the next apiary visit. Some I lose permanently. One I found metres from my hives after a farmer ploughed the paddock. I now carry four in the truck just in case.
They are made of steel so rust when sanitised in sodium chloride between apiaries, but they are sharp and are easier to force into the corner of the super to break the propolis seal or to prise the frames apart.
If you haven’t loosened the frames before using the J tip to lift a frame, you can either break the end off the top bar or lift the top bar off the rest of the frame, especially if you staple the frames together using a frame jig.
Hobbyists often nail their wooden frames together and put an additional nail from the top of the side bar into the top bar, or use a good waterproof glue to secure the frame's joints, which can prevent the hive tool from pulling the frame apart.
To prevent frame top bar ends from rotting, I use open mesh bottom boards and maintain a little top ventilation under the crown board during the winter. This helps keep the hives dry and prevents mould from building on the outer frames.
Alcohol wash for counting mite numbers
For those who attended the workshop on varroa at conference, someone asked Fiona O’Brien how much she diluted the rubbing alcohol. The answer is just under 50%. If too much water is added, it foams.
I liked the idea that Fiona used a tea strainer to reuse the alcohol. You lose too much straining through a cloth.
Things to do this month
Continue to make up new gear. Check hives after storms and heft them to determine honey stores. Feed pollen supplement and syrup to hives that are short of stores.
Clear away grass from in front of the hives, so bees landing short have a chance of crawling back into the hive. Check under the roofs of hives for excessive moisture. (More moisture is given off when brood rearing begins.)
Count back 10 weeks from your honey flow to work out when mite treatments go into the hives. Check the mite fall or do an alcohol wash to determine your mite percentage. Sample all hives if you can. Look for hives with low mite numbers to breed from. If you see the odd misshaped larvae or bee on the landing board, it’s a sign varroa is increasing in your hive, so treat immediately.
Remember that Apivar® requires a two-week withdrawal period before the honey flow starts, to keep the active ingredient (amitraz) from contaminating your honey.
Put out rodent baits in plastic bottles under a few hives in each apiary.
Have everything ready to go when the pressure comes on next month.
Frank Lindsay