About the Apiary
An informative and sometimes humorous column published in
The New Zealand Beekeeper Journal
SWARM CONTROL MEASURES
About the Apiary - October - 2015“Spring has sprung, the grass has riz ...” (author unknown, but popularised by Spike Milligan and others).
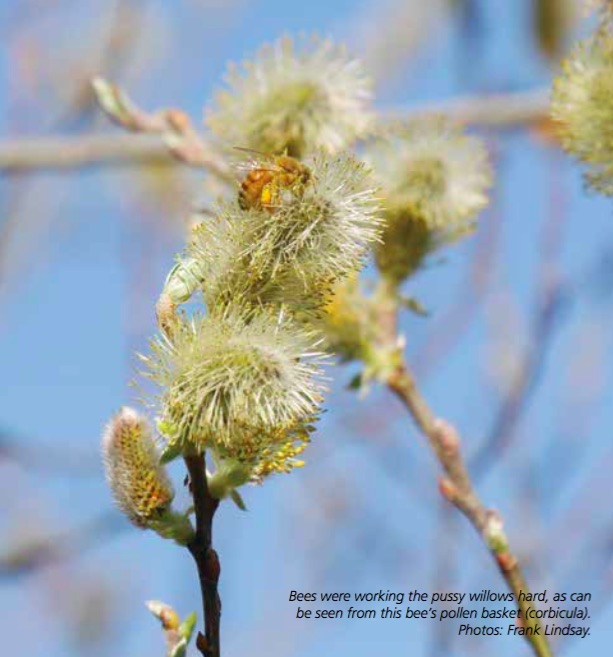
Wander through the bush and you can see shrubs developing their flowering buds. Hangehange (Geniostoma rupestre) is one of the first to flower with its distinct perfume. In the pastures, the odd dandelion is flowering, but the bees are really working the pussy willow, coming back to their hives covered in pollen. Bees are also gathering pollen from camellias and other garden flowers.
How do we know whether spring is going to be early or late? Without recording the flowering periods of some of your garden plants over the years, it’s very hard to tell. I use a succulent growing on a bank at home to tell me. On average, it starts flowering on 7 October, but we can also look at the weather maps on TV.
Surprising as it may seem, Ashburton is the first district in New Zealand to reach 20°C around the second week in September; the temperature needed to mate queens. It’s not until early October that the lower western North Island reaches this temperature.
And then just as you think things are warming up, another southerly dumps snow on the ranges again, restricting us from completing our hive inspections.
Swarming
In the Wellington area, strong hives start swarming around the last week in September and into early October. Hives have been stimulated by the continuous flowering of tree lucerne and Spanish heath through the winter, causing bee numbers to increase gradually. The flush of nectar and pollen that comes in with the willow flowering in mid- to late September cranks the hives into even greater brood production, as well as drone production. Some of the really strong hives are now filling two and a half full-depth boxes with bees and have the equivalent of eight frames of brood so have reached a point in their development (40,000+ bees) where they can easily issue a swarm.
Swarming is triggered by a number of conditions, but the main ones are to do with the age of the queen and congestion. The queen’s pheromones control the hive, and when not enough pheromone reaches all of the worker bees to suppress the development of their ovaries, some of the worker bees will start to construct queen cell buds.
Congestion is caused when the brood nest is restricted; i.e., it cannot continue to expand. When the hive can’t expand, the bees will swarm, regardless of the size of the container the colony is in, or whether it’s a nuc, a two- high hive or larger.
In the wild, bees generally like to occupy a cavity of a volume of 60 litres (about the size of a full-depth Langstroth box). When the hive becomes full of bees, they will swarm every second year, which is nature’s way that bees reproduce.
Checking for queen cells
Queen cell buds are formed along the bottom bars in the top brood super and along the edges of the frames on the outer limit of the brood nest. In checking the hives, I leave the queen cell buds along the bottom edge and rub out any that can’t be seen when viewing the super from underneath. I also mark any frames that have a hole in the comb, as this is also a likely spot where the bees will produce queen cells.
With the flowering of the cabbage tree and hawthorn in early October, the bees start to store the fresh nectar in and around the brood nest, preventing the queen from expanding the brood nest upwards. When a barrier of nectar is formed above the brood nest, congestion occurs and the bees start producing queen cells.
It hasn’t been proven whether the queen lays in the queen cell buds or whether the worker bees transfer eggs to the buds, but I believe it’s the former. The bees narrow the neck of the queen cell buds, which prompts the queen to deposit a fertilised egg in the cup when there are few other cells to lay in. You will see new, lighter-coloured wax around the tip of the buds as the bees start to draw out the queen cell. Inside the cell there is an egg or a developing queen larva.
Preventing swarms
No matter what you do, a hive will swarm unless you reduce its population. We beekeepers don’t want our hives to swarm as there goes the honey crop, so we perform a few management tools to stop this. Most commercial beekeepers reduce the brood and bee population by putting excess capped brood and bees into less-developed hives to give them an instant population boost in the next eight days, or they make nucleus colonies.
The books are full of different techniques, such as walk-away splits. This generally stops swarming, provided all queen cells are removed. You need to shake the majority of bees off the brood frames to locate all the queen cells, and especially look along the bottom of the comb adjacent the bottom bar. Sometimes a queen cell will lie horizontally along the bottom bar. If overlooked, the hive will swarm.
If the colony has a full box of bees covering all frames and has six frames of brood, plus adequate pollen and nectar, the bees will bounce back into a full, productive colony again after being split. Colonies of this size will double their number by December when the main honey flow starts.
or the less advanced hives, it’s just a matter of keeping the majority of brood in the lower super and reversing those that have moved fully into the second super.

Some beekeepers would have done this last month during the initial spring inspection. In the past month the brood area may have extended back down into the lower brood chamber as well. The procedure of reversing the brood supers is to allow the queen to keep laying to her full potential.
Quite often the majority of brood will be in the second brood super, with only a patch of brood extending down into the bottom super, perhaps halfway down in three or four frames. If these two supers were reversed again, it is likely that the brood that was in the bottom super (now in the second super) could become isolated from the majority of the brood nest and become chilled during a cold snap.
One way to prevent this is to take a fully capped frame of brood from the now-bottom super and place it in the centre of the second super, so it forms a bridge to the brood in the top part of the second super. This maintains the elliptical form of the cluster and the bees quickly clean out the lower cells in the second super and fill it with brood.
Those who use a single brood nest (restricting the queen’s movement by a queen excluder) will find that strong hives will produce brood right out to the outer frames. You can’t reverse the supers as there is only one; however, congestion can be removed by shaking the nurse bees off a couple of capped brood frames and placing them in the centre of the super immediately above the queen excluder.
Compact the brood nest by moving all the frames with brood into the centre of the box and replace the empty positions on the outside with drawn frames. Shake the bees off the frames to prevent the queen being transferred with the frames of brood into the upper super. Within a short time the nurse bees will have gone up through the queen excluder to keep the brood warm, thus relieving any congestion.
Hive inspections and feeding
We are now into a 10-day inspection regime. Inspections don’t have to take long: just split the brood nest and look along the bottom bars of the top super for developing queen cells.
Make sure the bees have at least three full frames of honey—a week’s supply for a strong hive. If there’s any less, the hive should be fed sugar syrup until the nectar flow. When you notice bees covering the bottom of four frames in the bottom super, add another super. In fact, add two three-quarter supers, as this will give the bees somewhere to store the initial lot of nectar that comes in this month.
If you don’t have any drawn frames, bring up some outside drawn frames from the super below and put them in the centre of the new super. This will draw the bees up into the super. Bees will not enter a super of foundation frames unless they are really congested and will often swarm before doing this.
During the next few weeks, as the bees start to draw the foundation frames beside the drawn ones, move the drawn ones out one position and place a new foundation frame between. It doesn’t take long to get the box of foundation frames drawn out, provided the bees have full stomachs (i.e., you have to keep feeding them, otherwise they won’t be producing wax).
Those starting with nucs will also have to keep feeding them a couple of litres of syrup every two or three days. The fewer bees committed to foraging, the more will be in the hive to keep it warm and expanding. An early four- or five-frame nuc should be able to build up and bring in enough nectar to support its self through the next winter: it just depends on the season. If the weather is unsettled, which it’s predicted to be this year, continue feeding the bees.

Things to do this month
Check feed, check pollen. Do an AFB check, and get your Certificate of Inspection (COI) in the post before the end of November.
Cull old frames, or at least move them to the outside of the super so they can be removed next inspection. Replace any with broken lugs, as well as those that you can’t see light through when held up to the sun.
Check varroa mite levels. Treat any that have more than two mites per 100 bees on an alcohol wash, or nine mites dropping in 24 hours through a mesh bottom board. We learnt at conference last year that hives with a 5% varroa level don’t produce much honey. Hives kept at or below a 1% varroa level produce 100% more honey than those with a 5% or more mite load.
Add foundation frames into and above the brood nest to keep the bees busy. Fit foundation into comb honey frames. Super hives before the flow starts.
Wash your bee suits and gloves after any stinging incident. Take all your gear off before entering your house to protect your family from the effects of bee venom.
Frank Lindsay