
About the Apiary
An informative and sometimes humorous column published in
The New Zealand Beekeeper Journal
MANAGING SWARMS, EXTRACTING HONEY AND PREPARING FOR WINTER
About the Apiary - March - 2016In and around Wellington the bees in the city are still flying, thanks to people watering their gardens. In the country, where rain produced a profusion of clover, lotus major and catsear flowering two weeks ago, there is hardly a green leaf anywhere.
This situation resulted because the greater Wellington area had a prolonged spell of beautiful hot days, without the rain that other parts of New Zealand received. Luckily, the saviour has been late-flowering eucalyptus, which is providing a late nectar flow to those bees that can access them.
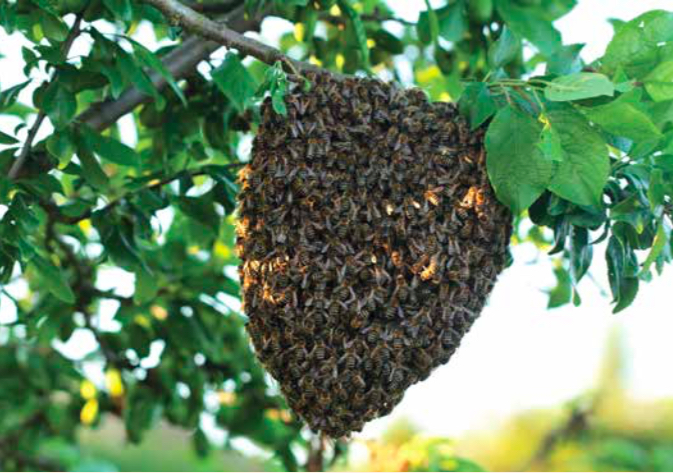
Late swarms
That profuse flowering and the resulting nectar flow caused some hives to become overcrowded and to produce late swarms.
I had a phone call recently about a late swarm hanging on a branch on a coastal walking road, kilometres behind a locked gate. A beekeeper just can’t leave a swarm behind, as it would be such a waste even this late in the season. The story had a happy ending when another beekeeper had a key and was able to retrieve the swarm.
He's not the only one to see late swarms. I had one fly in front of me as I was leaving a farm. From the direction it came from, it wasn’t mine. The bees were flying low to the ground and moving so fast you couldn’t see where they went. Another recent swarm found another entrance to a tree I had plugged with foam, which now will have to be destroyed as the tree has AFB inside.
Back to that swarm on the coastal road. A beekeeper had also noticed that bees were all over Muehlenbeckia (maidenhair genus), a shrubby bush with twisted branches that go inwards on themselves to form a thick clump of vegetation. (They grew this way to protect themselves from our ancient browsing birds, the moa.) A beekeeper had placed hives in this area for mānuka but the bees were all over these scrubs. Maybe the mānuka had finished, but no doubt the honey on these hives is going to be a mix as they were flowering so profusely.
So I searched on Google for all the different types of Muehlenbeckia>. One entry for M. astonii led me to the word mingimingi. I associate only one type of scrub as mingimingi and that is Cyathodes juniperina>, which flowers just before mānuka in the bush fringe. The only bit of this scrub that resembles the definition of mingimingi is that this bush has prickly tipped leaves.
Mingimingi is described as: (noun) broad- leaved mingimingi, Leucopogon fasciculatus, Coprosma propinqua var. propinqua and prickly mingimingi, Leptecophylla juniperina—native shrubs with small, narrow leaves which alternate or are in tufts, prickly to touch. The fruit is red, pink, blue or white and the bark is black.
Do an Internet search of minigmingi photos and you will find lots of different scrubs using this name. In future, I will have to learn the Latin names instead of relying on the common names as they can be so confusing.
Removing the honey crop
Most commercial beekeepers will have already removed part of their honey crop. When the flow is on and the bees are working hard, they take no notice of you and it’s possible to stand the top honey super on its end and work through the hives in the apiary in this manner.
By the time you have finished a row of hives, most of the bees would have made their way back to their hive entrance of their own accord. All that remains to be done is to blow the few bees left out from the bottom bars towards the top bars, moving each aside slightly to expose any bees that are left. Once clear of bees, the supers are stacked on pallets and covered.
Beekeepers in town can’t do this, as it would disturb the neighbourhood. You have to use escape boards with a couple of escapes, which allow the bees to move down into the brood chambers below. The bees will not move down if the bottom supers are full of bees or if it’s hot, so it may be necessary to add an empty super below the escape board to create room for them. The bees also won’t work if the board is put on upside down. In the city we work our bees early in the morning or in the early evening, so we don’t interfere with our neighbours’ enjoyment of their gardens.
Preparing the hive for winter
There are a number of tasks to do when taking off honey and preparing the hive for winter. These include checking for disease, replacing any woodware that has rot or extra entrances, and checking the viability of the queen to determine whether it should be replaced.
After smoking the entrance and allowing time for the smoke to work, crack (split apart) all the supers that contain frames that are fully and nearly fully capped. This will break any brace comb the bees have built to join the supers together, and will allow the bees time to clean up any cells ruptured in the process. If you don’t do this, honey from the fractured comb will leak from the frames, making a mess. If honey drips outside the hives, it’s likely to stimulate robbing if the flow has finished.The next day, take off all the honey supers and place these on the upturned roof, right down to the bottom brood super, and check for AFB and other diseases. Flick off any capped cells that haven’t emerged amongst a patch of cells where the bees have already emerged.

At the same time while the hives are open, do a bit of maintenance. Move any old, broken, rotten lugs or frames with more than 10% drone brood to the outside of the brood box. Remove any partly drawn or undrawn frames and replace with fully drawn frames, or one from the outside of a honey super. These are likely to have a higher moisture content or may not be completely capped.
For those that don’t use queen excluders, move any frames with patches of brood or pollen and honey down into the supers below the escape board. Allow at least a complete full-depth super of honey for winter supplies and insert the escape board over the top on the food super. If the hive is crowded, add another super and place the escape board on top of this. Reassemble the hive. Seal up any cracks and the ventilation hole in the hive mat with foam plastic to stop any robbing. (I insert my escape board above the third super as I leave on more honey on than necessary, so the hives are by spring strong and ready for splitting.)
Early the next morning, puff a little smoke in the entrance to calm the bees and take off the honey supers. There may be a few bees left in the bottom super that can be brushed out. Sort the frames by honey colour so you have different flavoured honeys. Extract while it’s still warm and put the honey supers back on for the bees to clean out after dark: this prevents robbing and disruption to the neighbourhood by excited bees looking for a nearby flow.
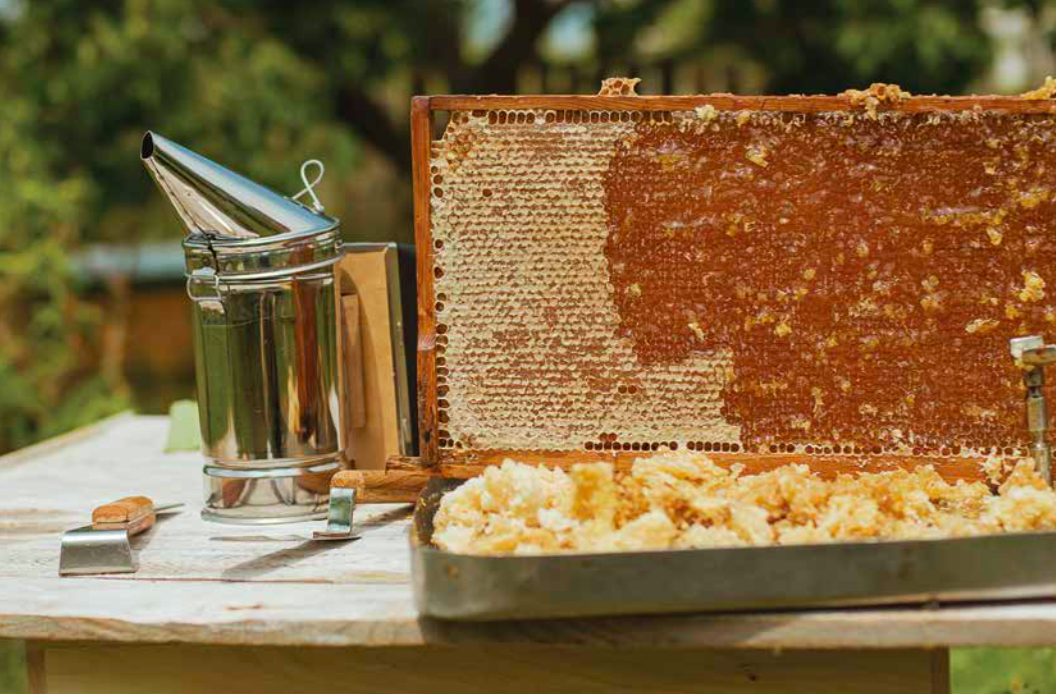
Extracting honey
When it comes to extracting, please remember that honey is a sticky business. It tends to go everywhere and it can take time to clean up using lots of hot water. You will only be able to use the kitchen once if you make a mess. Use plenty of newsprint on the floor and wherever you walk.
For those with just a couple of supers that have been drawn out that season, it’s easy to extract without using a purchased or hired extractor. Close all the windows and doors, as your bees will smell the fresh honey once you start extracting and will be buzzing around looking for the source of the honey.
If you are extracting just a few frames, place a frame on its end in a large baking dish and use the tines of a fork to break the wax cappings. Then use the side of the fork to remove the cells right down to the midrib. Do this slowly as you don’t want to break the foundation’s midrib. Remove the honey off the other side of the frame but more carefully this time, as you now will only have the foundation structure that’s not very strong. The bees will clean the frames and repair any damage in a few days once they are back on the hive.
Allow the honey to settle for an hour so the wax rises to the surface. Skim off and then strain the honey through a nylon stocking. Don’t force this process, as fine wax will filter through. Hang to drain, then add in the cappings and allow to drain overnight.
The more honey you produce, the more gear you will require. Make your own uncapping– straining bin. Purchase two plastic bins, one deep and one shallow, that fit inside each other. The shallower one should sit halfway inside the deeper one. Drill lots of three- millimetre holes about 10 millimetres apart across the base of the shallow bin. This will hold the cappings and allow the honey to drain through to the bottom one.
Then make a wooden frame with a nail driven through in the middle from the underside to hold the frame on while it’s being uncapped. This secures the frame and allows you to hold the frame in one hand and then turn it without have to lift it off and reposition it. The frame looks a little like the American migratory roof: a flat board with a bit of timber screwed at each end so that it sits across the plastic bin and doesn’t slide off.
/If you have more than half a dozen supers to extract, hire an extractor or have somebody do it for you. It’s often a good idea to get together with a number of beekeepers and have an extracting day sharing the tasks, doing all your honey at the same time. Each will need a pail to hold their honey once it comes out of the extractor.
Use a serrated bread knife and gently saw down the frame, cutting off the cappings. Any areas of capping not taken off with the knife can be scratched with a fork to expose the honey. In Europe, they use a cappings scratcher and with the tines, gently lift off the cappings hardly disturbing the honey underneath. Keep cappings separate. This type of cappings scratcher is available for purchase in New Zealand, but the following website gives you an idea of what is available http://www.swienty.com/shop/default.asp?catid=1127.
Select frames of equal weight and place these opposite each other in the extractor. If you don’t, the vibration will dance the extractor all over the floor. Note: Each frame is placed in the basket with the top bar facing the outside of the extractor. Cells have a nine-degree upwards angle and by placing them this way, the honey flows out of the cells more easily; i.e., the extractor is spun in the direction of the bottom bar for each side. The idea is to remove half the honey on one side, then turn the frames over (or reverse the direction of the extractor), then fully spin out the honey from the other side, turn again and fully remove the honey from the first side.
Trying to remove the honey fully from the first side will cause the honey on the other side to break your foundation wax. One beekeeper used these timings for 90% extraction of the honey from the frames: one minute for half extraction of the first side, two minutes for the reverse side and a further minute to empty the first side. By extracting this way and quickly returning the wet honey supers to the hives, the bees would fill them up again on a good flow.
At the end of the session, cover the cappings bin and allow the honey in the cappings to drain over night. It’s important to cover everything as honey is hygroscopic and draws in moisture. Too much moisture and the honey will ferment. Being a hot, dry summer this year, most of the honey will have a moisture content below 18%, so it’s unlikely to be a problem, but cover it anyway to prevent dust settling on the honey.
Honey is a supersaturated sugar solution and it doesn’t take long for it to crystallise on particles of dust or pollen in the honey. Some with high-glucose levels like pohutukawa will granulate within four days after extracting. To stop the honey forming large crystals, we introduce a smooth grain honey to it and stir it in. A fine grain gives a smooth feeling in the mouth. You can purchase a small honey pot of South Island clover and use this as your starter. Add 500 grams to five kilograms and stir in until you see a white bloom appear. Then add this to a 30-kilogram pail and stir in. Once you see the bloom (it could take a day or two if stirred three times a day), the honey can be potted up. Honey granulates at 13°C so may not set unless it’s stored in a basement.

Return the extracted frames at night so the bees don’t get excited. Sometimes the bees will fill up the supers again if the flow continues. An easy way to get the bees to clean out the supers is to put them above the clearer/escape board with the bee escapes removed. The bees will take the wet honey down and store it around the brood. This is what you want at this time of the year. Any nectar brought in from now on should be stored in the brood area to reduce the amount of brood in the hives. Going into winter the ideal would be to have two supers, the top one completely full of honey and the bottom super with honey and pollen, with three to four frames of brood in the middle.
Treating for varroa
You won’t overwinter your bees if they have varroa mites. I’m just starting to see the odd bee crawling around the grass on my front lawn. Varroa fed on these bees and although they look OK on the outside, they don’t have the strength or internal development to fly. It’s called ‘crawling death’ and is the first sign that the hive is in trouble. It’s only at a later stage that you see mites on bees and generally at this stage it’s only a few weeks before the hive is dead if not treated. To winter over, the bees need to have two brood cycles free of mites, so your treatment should be in now. If you are using an alternative, apply from now on.
I use a combination of two treatments: formic acid and strips. The formic acid is applied weekly as a flash treatment for three to four weeks (one complete brood cycle) to clean up any varroa that is resistant to the strips. Those without mesh bottom boards need to sample mite levels by doing a soap or alcohol wash of 300 bees (half a cup) from around the brood nest. Marking the queen makes her easy to find, as you don’t want her to end up in the wash. (Don’t smile; this is easy to do. I once sampled 12 hives by just scooping up bees off the brood comb. I got three queens in these samples. Unfortunately they were dead before I spotted them.)
Other observations
All the hype over producing mānuka and paying for hive sites may have its downside this year. I have been around some of my apiaries checking the top supers put on when the mānuka was in full flower. Imagine my disappointment when nearly all of these were empty, except for a small amount of wet honey in a middle frame. Seems that in some areas it was too dry and warm—the mānuka nectar either didn’t secrete or dried out before the bees could utilise it.
I stood up a couple of hives that had toppled over. One was on its side and had brood in three supers, with a massive bee population. Even though the top super had split off slightly from the main body of supers (I use a nylon rope around my hives so they stay together), there were enough bees to bridge the gap, which stopped any robbing. The grass under the hives hadn’t yellowed so this had happened within the last couple of days; yet the bees had started building comb in the gap left at the side as the frames squashed up. (This was being taken from the exposed super.) When a hive falls on its side, new wax honey frames bend and need to be gently forced back into shape so they hang vertically again. This doesn’t happen with plastic frames as they hold their shape.
I checked for eggs and there were some in each super, so I split the hive and added an extra super above the brood nest and one on top to each. One will have the queen and the original hive should attract most of the field bees, so they could produce some more honey now that there isn’t so much brood to look after.
I have one apiary in a berryfruit orchard year round. They need to be there all year, as the grower staggers the growing of the berries. Strawberries, when they have just about finished, are topped and will come away again, producing another crop. Some of the raspberries are topped early in the season so have to grow new leaders, which makes them fruit later. In this way and with succession of plantings, fruit are produced late into the autumn.
The last few loganberries are now hanging on the drying vines, while the plums are ready for picking. It amazes me that these trees produce a bumper crop every year, yet those in my garden produce nothing. I think it’s just too cold where I live to produce plums. Apples, peaches and pears grow well but not plums. They are pollinated as the bees are all over them, but I don’t think the flowers get fertilised.
I have been producing queen cells and mating them in mini nucs on the front lawn (we live above the road), which is something I was doing 30 years ago. With fewer hives, I now have time to do a small amount of this, which is very enjoyable. You don’t know what the results are until you see the brood, and you get an appreciation what goes into producing the mated queen that arrives in the mail.

In preparing for the Camp Rangi weekend in late February (organised by the Southern North Island Branch), I read articles from the 1980s. There hasn’t been much in recent years on queen rearing in The New Zealand BeeKeeper, so perhaps one of our queen producers will start writing a few articles. The big advances in gene technology are now being used in the bee industry to identify traits. It’s now easier to identify a trait scientifically instead of selective breeding, which can take years.
In thinking about beekeeping then and now, the big difference today is that varroa mites have eliminated all the feral bees. The only ferals out there are escaped swarms. Although you could purchase nice yellow Italian bees when I first started beekeeping, I liked the English black bee, Apis mellifera mellifera. These were readily available, as you could cut them out of a log and remove them from houses and sheds. This is how I acquired most of my bees. Some were very gentle, but others really stung you to bits. I used to carry two bee suits and change when I was getting too many stings. I persisted with these bees because they produced honey, no matter what the season. They would fly during the winter and I bred quite a good bee in the end, although they were still defensive. This changed when chalkbrood arrived, as these bees were susceptible to this disease.
Without these feral bees, producing good queens today with open matings is a lot easier. We now have such gentle bees that one hardly needs to use a veil, but I still wear a suit just in case. What a difference varroa has made: I wouldn’t have believed there was a positive side to varroa.
I was recently interviewed on the kiwimana buzz show. I had a great time talking about beekeeping in the Wellington area. You can listen to the show here: http://kiwi.bz/frank
Things to do this month
Remove all comb honey frames. Remove and extract surplus honey— those frames that are not fully capped should be shaken to make sure the honey is dry. Otherwise, leave it for the bees or dry it further in the honey house using fans and a dehumidifier (although with the drought, this most probably is unnecessary).
Don’t forget to do an AFB check before removing any honey. If bees are robbing, mark the supers and check the hives once the honey is off. Return any honey supers to diseased hives and burn them.
Requeen hives. Now is the best time to get queens mated while it’s still warm and there are plenty of drones about. Queen producers should also have mated queens on hand if required.
In some areas it’s time to winter down hives. Replace any woodware that requires attention. Keep an eye out for wasps, and close entrances down so the bees are better able to defend the hives against them and to stop mice getting into your hives.
Monitor mite levels when miticide treatments have been completed. Results with organic treatments can differ from hive to hive.
Frank Lindsay